I live in Houston, and for those who pay attention to the news may have noticed that a big ol' hurricane rolled through here Friday night. I was watching Prison Break on my DVR and missed the end of the episode when the lights went out. Bummer.
One gift Ike gave my family was a power outage. We were still out Sunday night. Fortunately, I've got a propane grill and a smoker, and for hurricane prep, I bought a big bag of charcoal. I happened to have a freezer full of meat, so I got to smoking. I smoked chicken Saturday, chicken and pork roast Sunday. Now, I think it's too late to smoke anything else, as the food's going to start spoiling.
I went to check on my Dad Sunday morning, and he had his two Coleman camp stoves out on the patio, and had just finished a breakfast of scrambled eggs with peppers, mushrooms, and onions, and a pot of coffee. So I didn't feel too bad for him. We're all weathering this ok.
Now it's going to get boring - rice and beans and pasta is what I've got in the pantry. I try to remember to keep pretty well stocked on dried goods during the hurricane season, so I'm not one of those desparate people running to the store at the last minute. I went Monday night, just in case, and just bought a bag of charcoal and a couple of bottles of pasta sauce. Thursday afternoon, I dropped by the liquor store, and the place was packed! Everybody was buying beer by the case, two liter bottles of vodka, you name it. Hey, if you're gonna ride the storm out, you may as well have something to do!
Monday, September 15, 2008
Saturday, August 23, 2008
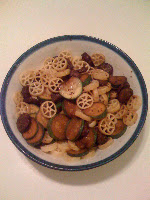
Recipe: A Celebration of Circles (pasta, sausage, and zucchini)
I love this recipe - it has fantastic visual appeal, and it is very easy. This came out of the Williams-Sonoma Pasta cookbook.
- four links fresh hot Italian sausage
- two zucchinis
- four cloves garlic, crushed then chopped
- 1 cup dry white wine (red's OK, too, but white will not turn the zucchini purple)
- 1/2 cup water
- parmesan cheese
- salt and pepper
- red pepper flakes
- 2 tablespoons olive oil
- 1 tablespoon unsalted butter (although I guess salted is OK - we're adding salt to this dish, so why should it matter?)
- 12 oz. rotini (the wagon wheel type)
In a heavy saucepan, heat about a teaspoon of olive oil and saute the garlic until it's translucent - do not brown. It's better to undercook the garlic at this stage than to overcook, as there's plenty more cooking that this stuff will be involved in. Add the sausage, wat
er, and wine. Bring to a boil, then simmer for 15 minutes. If the sausage is not covered by the liquid, turn them over half way through. Remove the sausage and set aside, and let the liquid continue to simmer until it's reduced to about a tablespoon or two. In the meanwhile, get get a large pot of salted water boiling for the pasta, and slice the zucchini into nice little circles about 1/8 to 1/4 inch thick. Slice the sausage the same way. Once the wine has been reduced, add the zucchini, sausage, butter, and a tablespoon of olive oil and stir it all up. Add about a half teaspoon of salt, a few turns of freshly grated black pepper, and a pinch (or more) of red pepper flakes. Stir well, and heat on low while you attend to the pasta. Just make sure the sausage has cooked through.
When your pasta is finished (al dente, mind you!), drain, add the remaining olive oil (about 2 teaspoons), and toss. Serve in a large warmed bowl - just mix all of the ingredients together, and top with freshly grated parmesan. With dishes like this, I eyeball the pasta to make sure my proportions are right - I frequently make too much, so put about half the pasta in the bowl, add the sausage / zucchini mix, stir, and then add pasta until it meets your satisfaction from a visual perspective. Serves four.
Yummy!
Friday, August 22, 2008
Recipe: Butter Chicken (Murg Makhani)
With all of the globalization of the economy going on, I spend quite a bit of time in India - about two to three months per year. I've never been a big fan of Indian cuisine, although I've developed a taste over the past couple of years. I still don't know what the hell anything is when I eat in the cafeteria at work - it's a bunch of chafing dished filled with veg curries. I've found that yellow and orange are usually pretty good. If it's in the dish after the rice, put it on your rice. Grab some chapati. Life is simple.
Anyway, I thought I'd try my hand at making some of my own Indian food at home this week. I broke what I usually consider a cardinal rule - don't try more than one new recipe for any single meal. I wrote that rule when I had a dinner party and we ambitiously tried three or four new recipes including dessert. There were tamales, some kind of ancho-chile peppered and honeyed yams, and cream of jalapeno soup. Needless to say, our guests had to help us finish all of the cooking, and we served dinner about two hours later than planned.
However, I'm on vacation, so I threw caution to the wind, and made daal, butter chicken, and naan for dinner last night. The daal was OK, but nothing like what I've experienced in India - I prefer the moong daal (the yellow daal) and didn't see it at my local grocery store. I will find some and do this again. The naan turned out very tasty - the recipe I used had some flour, water, yeast, yoghurt, and some of my sourdough starter. You need only about two hours of leavening time, and cook on a stone in a 550 degree oven. I made it a bit too thick, and it had a nice pocket like pita bread, and it was a bit stiffer than the good soft naan I've had in restaurants in India. Nonetheless, I enjoyed it, and will make this again.
Now to the butter chicken. If you haven't had butter chicken, it's much like chicken tikka masala, although generally, it's not made as spicy. It has a creamy tomato gravy.
I found this nice recipe online - I substituted walnut oil for canola oil (I prefer olive oil or walnut oil to the other popular frying oils). I found that I hadn't added enough cayenne, as I would have enjoyed more kick. However, you can spice to the needs of your palate. Also, if you have fresh peppers around, I think those should be added at the stage where you're sauteing the onion and do this instead of the cayenne. I think a habanero pepper would go great with this dish.
Here's a link to the recipe. Note: this will take about an hour.
BTW - I found something funny on wikipedia - I was looking up chicken tikka masala and found this hindi translation:
Hindi: चिकन टिक्का मसाला
Hindi: चिकन टिक्का मसाला
The first word (चिकन ) is just a direct transliteration of the English word "chicken" rather than the Hindi word for chicken, "murg." Maybe that ties to the fact that the article says this dish was actually invented in the UK, so there is no such thing as murg tikka masala. Hell, I don't know.
dave
Sunday, August 17, 2008
Polenta?
I'm a southern boy, so I really like corn grits. (as if there's any other kind of grits - but I'm just throwing a bone to my culturally disadvantaged readers here)
I still remember the day when I went to some fancy Italian restaurant and discovered that they had grits with class. Only they called it "polenta." That was a revelation to me. For the first time, I saw the possibility of ordering a $15 entree with grits (i mean, polenta) that didn't include bacon, eggs, or milk gravy.
When I make grits at home (it's been awhile, I admit it), I use the real grits - I'm not a big fan of the instant stuff. That's probably why I don't do it all the time, as it makes a big mess of your saucepan. Regardless, it's just the right thing to do.
The funny thing is, the last time I had grits, I was in India. Don't even ask me how that worked out - it's a long story. Let's just say it was Monday morning at 5AM and I was watching the Superbowl, eating grits and bacon. with a colleague, while trying to explain the game of football to our Nepalese cook.
Back to the topic here - I bought a tube of readymade polenta the other day. I wanted to try out an Italian recipe with the stuff at home, and if it worked out, then I figured I'd move it into the rotation using the actual home made stuff. It worked out.
- 1 pound polenta
- pasta sauce
- olive oil and butter
I just heated up about 1/4 cup of olive oil and about 1/4 stick of butter and fried the polenta pieces sliced about 1/4" thick. They came in a tube, so it was basically a cylinder of about 2" diameter. Saute the polenta for about 5 minutes. If they're not covered by oil, you'll need to flip them. Serve with pasta sauce (arrabiata, puttanesca, or marinara) and top with parmesan. This is a nice side to any Italian meat dish.
Recipe: Tortilla Soup

This is one of my all time favorites, and there are a number of ways to make this, so it's hard to go wrong. You can make it very light, to serve as a "cup o' soup" appetizer, or fill it up with chicken and/or veggies to make a meal out of it. This can be a veg or non-veg dish - just substitute vegetable broth for chicken broth, and that's it.
Start with six cups of chicken broth. First choice - homemade broth from a roasted chicken. Second choice, fresh broth from the store. Third choice, canned broth (in those cardboard boxes) on the grocer's shelf. Last choice - chicken boullion cubes. When I cook chicken or turkey, I like to take the carcass and make a nice broth. Just bring it all to a boil, and then let it simmer for a couple of hours. I was reading a cooking book about making consomme, and for that, they were simmering very clean bones for something like 8 hours to make a very clear broth. That's not what we're doing here - I'll throw in the skin and everything. After cooking, strain it well and use immediately or refrigerate.
If you refrigerate the broth after making it, the fat will solidify on the top, and you can easily spoon it off before using it for a recipe. If you intend to use it immediately, you'll have to separate the fat with one of those broth cups with the spout that pours the broth from the bottom of the cup. I've also found that if I put a freshly made broth in the refrigerator rather than the freezer, I'll be more likely to use it in the next week. I still have three tubs of turkey broth in the freezer from Thanksgiving 2005.
The other feature of tortilla soup is, well, the tortillas. Corn tortillas are required for this - and they don't have to be too fresh, as you're going to fry them up. If you're making an appetizer, use one tortilla per person, and for a meal, use two. This is a bit more than you'll put into the soup, but people tend to snack on these things. I like to cut the tortillas into 1/4" wide strips, then fry them in batches - you don't want to put so many in there that they stick together. Get your oil good and hot so that one drop of water dribbled in the pan makes a mighty commotion (about 7 on my electric range). If the oil is too hot, the tortillas will brown immediately. If not hot enough, they will be greasy and soggy. Your job is to find the middle ground. If you find the middle ground, the tortilla strips should become nice and crispy within around one minute, and still retain their yellow color.
The recipe
- 6 cups chicken or vegetable broth
- fried tortilla strips
- two medium sized tomatoes
- 1/2 large white onion
- 2 cloves garlic
- 1 habanero or jalapeno pepper (watch out if you're a softie!)
- 1 tbsp cumin
- 1 tsp salt
- a few turns of fresh grated black pepper
- 1 cup grated cheddar or jack cheese
- 2 ripe avocados
- (optional) a handful of cooked chicken pieces (i use leftovers from a roast and make this the next day)
- (optional) fresh carrots / chayote squash
After washing (I assume you're clean - I'm talking about the vegetables here), put all of the vegetables into an oven proof dish and broil on low for a few minutes - maybe just two or three. You will probably have to remove the peppers before completing this exercise, as the recipe does not call for "the charred remains of one habanero pepper." The goal is to get the tomatoes nice and falling apart, and the onion sweetly smoking. I prefer to use a smoked onion for this - cut in half and put in the smoker, but I'm not always smoking. The garlic should be a nice paste at this point.
Bring the chicken broth to a boil, slice and dice all of your vegetables (including the optional ones) and toss them in. Add the spices, stir, and bring to a nice simmer. If you're using additional vegetables such as carrots or squash, you want to let this simmar for at least 15 minutes to get those flavors to blend. Otherwise, 10 minutes is OK. If you're adding chicken to the soup, add it about two to three minutes before serving. Chicken boiled to pieces for a long time loses its flavor, and since you already have a nice chicken broth, all you need from these pieces of chicken is substance (and you need it to warm up, eh?). I trust that you've already completed making the tortilla chips by now, or you will have to just put this pot on a back burner and let it go a bit longer.
Grate the cheese and slice up the avocados. You can allow your guests to make their own bowls with an assembly line of chips, cheese, soup, then avocado, or you can serve it yourself. Put the chips on the bottom, then a pinch of cheese, pour in the soup, and garnish with avocado.
This will easily make four big bowls or six to eight cups o' soup.
Saturday, August 2, 2008
Recipe: Dave's Marinara

I have to admit it - I love pasta. Real pasta made from durham wheat semolina. I try that whole wheat pasta every now and again, but it just doesn't taste good. I'm sorry, guys, but I'm about taste. Brown rice tastes good. Whole wheat bread tastes good. Whole wheat pasta? Fuggeddaboutit.
This recipe will go with your favorite meat / seafood accompaniment. Ordinarily, I'll use Italian sausage, but on occasion, will substitute shrimp or some other ocean critter. Last night, said critter was mollusks.
My preferred way to make a marinara is to use fresh Roma tomatoes. Sure, you can use a 28 oz can of stewed Italian tomatoes, but if you have time, the real deal is the best.
About the wine - I usually use wine from the bottle that I'll be serving with dinner. If you're not cracking a bottle on this occasion, a cooking wine is fine. I prefer Marsala for cooking, it has a very nice flavor. If you do the Marsala thing - go buy a bottle at your local discount liquor store, rather than spending $5 on 1/4 of a bottle of cooking wine at the grocery store. In the liquor store, it will be over near the sherries and ports, and you can buy the cheapest bottle for $6 or $7.
- 2 pounds ripe Roma tomatoes (about 12 medium sized)
- 6 medium to large cloves garlic
- 1 tbsp oregano (or some fresh stuff if you can find it)
- 4 sprigs fresh basil (at least 20 leaves) or 2 tbsp dried (yuck)
- 1 bay leaf
- 1/4 cup red wine
- olive oil
- (optional) mushrooms
- 1/2 tsp salt
- 1 tsp red pepper flakes
- 6 oz. can of tomato paste
- meat or seafood of choice
Get a big saucepan of water boiling - this can be the same one you'll cook the pasta in. Once the water is at a full boil, add the tomatoes. Let the water return to a boil, and then let those tomatoes roll around for a good five minutes or so. You should see a few of them splitting before you remove them from the heat.
Drain these bad boys in a colander, and cover with ice. The ice causes the skins to split on all of these, and it lowers the temperature enough to where you can handle the tomatoes with your bare hands. Once the tomatoes have cooled enough, peel off the skins, and move them to the cutting board. If required, cut out the stem area of the tomato with a paring knife.
(We're multitasking now) While all of this is going on, get some olive oil going for sauteing the garlic. If you're going to use mushrooms, you'll need at least two tbsp olive oil. If not, 1 is about right. Hell, I don't know, I just pour that stuff in the pan until it looks right.
Anyway, in a medium skillet, heat up olive oil to medium-low. I prefer to crush unpeeled garlic cloves with the flat blade of a large knife. This makes it easy to remove the skin, and releases a lot of oil. I mash it enough to break it into a few pieces, and then I chop. I used to mince garlic in a garlic press, but if you mash it enough prior to chopping, the effect is about the same, and it's one less tool to put in the dishwasher. Add the garlic to the heated olive oil, and saute until translucent. If you're doing mushrooms, add them within a minute or two of the garlic (prior to achieving translucence) and get the whole batch going together at the same time.
Once the garlic is translucent or the 'shrooms are done, add the wine. let that bubble and reduce to about 50%. Note - if you're doing Italian sausage, you'll need to have this cooked by now. One method is to bake for 30 minutes on 400 (poke with fork prior), or just strip off the skin and brown like ground beef.
While all of this is going on, chop the aforementioned tomatoes and dump into a medium saucepan. Purists may want to remove the seeds at this point, but that's kind of a pain in the ass. Add the bay leaf, red pepper flakes (to taste), salt, oregano, and tomato paste. Combine with the sauteed garlic, and bring to a nice simmer. If you have fresh basil, chop that up and add it now.
In the meantime (you have to stay on your toes), you should have the water for the pasta boiling. A good linguini takes about 7-8 minutes to boil, so add the linguini to the water once you have the sauce on a low simmer. If you're doing mussels, add them directly to the sauce now. Let the sauce simmer until the pasta is done; the mussels should have opened up by now. Serve with parmesan (fresh grated Reggiano is the best, but I guess some Kraft out of the can is ok - it beats sawdust, at least).
Garlic bread and a salad will fill out this meal. When I'm baking, I use ciabatta for garlic bread - it's the best. When I was a kid I was always confused why my folks bought French bread to make garlic bread for an Italian meal. I don't know - it was just some cognitive dissonance that I had to get over.
Saturday, June 7, 2008
Sour Dill Pickles

This recipe takes only 2-3 months.
First, go to the nursery, and buy four to six cucumber plants. Plant, nurture, and wait until you have cucumbers.
In all seriousness, I like to grow cucumbers every spring and make my own pickles. I can occasionally find kirby cucumbers in the grocery store (and it's even harder to find the right plants - you need the smaller cucumbers for pickling). It's a two day recipe, though, so be prepared.
Once you have cucumbers and ingredients in hand, this is a pretty quick recipe other than the wait time in between steps. Sometimes, it's harder for me to find the fresh dill than to actually do the recipe. I've done this once with dried dill weed, and it just wasn't the same.
I have to attribute Jim Fobel for this recipe - his cookbook is called Jim Fobel's Big Flavors. I've found that this makes very crunchy crispy sour dills. Many pickle recipes have you cooking and doing the traditional canning process, but I think that gives you the softer pickles that I don't like as much. Be cautioned, however, that these must be refrigerated immediately and last just six months to a year. I seem to have a problem where they last only a few weeks, as they get eaten pretty quickly.
Ingredients
- 2 pounds kirby cucumbers (8 to 12)
- 1/2 cup pickling salt / kosher salt - basically any salt without iodine added
- 2 bay leaves
- 2 tsp coriander seeds
- 1/2 tsp red pepper flakes
- 1 cup cider vinegar
- 3 large garlic cloves
- 1/2 cup fresh dill or 1 tbsp dried dill weed
- 1 tsp dill seeds
First you want to brine the pickles - make sure they've been well rinsed - add the salt to five cups of tap water and stir to dissolve the salt. You need to find a bowl where the pickles can be submerged completely in this mixture. I use a couple of big souflee dishes and put a plate on top to keep the cucumbers down.
Brine for two days.
Once this exercise is complete, heat up some of the ingredients in a sauce pan - 1 cup water, 1 tablespoon salt, the bay leaves, coriander, and pepper flakes. Bring to a boil, and then let it cool to room temperature. This may be an hour or two later, so wait until you're ready to complete the recipe to remove the cucumbers from the brine and rinse them well.
Slice the garlic, and set aside with the fresh dill. Mix all of the remaining ingredients in a bowl with 2 cups cold water. I use 1 quart mason jars, and I pack the soon-to-be pickles, garlic, and dill weed in the jars, then pour the liquid into them to fill them up. This recipe will make about two jars - I frequently halve it and make one jar at a time, based on my cucumber yield. Refrigerate.
Lastly, if you grow your own, what you can do with the last two or three cucumbers to come off the vine is to brine them for two days, and then just rinse and drop into one of your jars from which you've already consumed a pickle or two.
Three Quiches

Mexican Quiche
I'll start with my variation on the theme. I learned to make quiche from a college roommate many moons ago. I've since morphed the classic quiche Lorraine recipe into my own adaptation, using the flavors of the southwest that I like so much.
The crust. If you want a quick quiche, and you're not experienced at making pies, then just go buy a pie crust. However, I think a special touch for the Mexican quiche is to make a masa harina crust. Masa harina (a corn flour used to make tortillas, tamales, etc.) isn't as workable as white flour, so you would need to either use more shortening than normal, or just deal with it falling apart on you. I prefer the latter, as I try to minimize the trans fats you get from Crisco. For regular quiches, I prefer homemade pie crusts anyway. They're just better, and in my book, worth the work.
Ingredients
- pie crust
- 1 cup shredded cheddar / monterrey jack cheese (I use about half and half)
- 4 eggs
- 2 cups whipping cream
- 1/3 cup chopped onion
- 1/2 cup chopped tomatillos (about 4 or 5? I always buy too many)
- (optional) 1/4 cup chopped chayote
- (not optional) 1 tablespoon comino
- 1 tsp chili powder
- 1/2 to 1 chopped jalapeno, habanero, or the like to the level of spiciness you can handle
- 1/2 tsp salt
- a few turns of freshly grated black pepper
If you're not familiar with chayote, that's a really cool Mexican squash. I first had that a couple of years ago when I added it to a Mexican style cornbread dressing for Christmas dinner. It's nothing like any other squash I've ever had. It's green and firm, and sweeter than zucchini. When you chop it up, it's as slimy as okra, but the slime comes out while chopping - not cooking, so you don't end up with the mucous factor you get when cooking okra. For the record, I don't like okra. So check it out if you can. I can find it just about everywhere in Houston.
The tomatillos are the key ingredient to this dish - I don't know how common they are in other parts of the country, but again, I can always find those in my neighborhood grocery store in Houston. Tomatillos add a lot of sweetness, but they also add a lot of liquid. I've found that if I don't really push the baking time to maximum browning on the top, it's a bit too wet.
So, let's get started. Heat the oven to 425, put all of the ingredients other than the eggs / cream in the quiche pan. I beat up the eggs and add the whole cream in big 1 quart measuring cup, so it's consistent. They key is you may not use all of this mixture, so you want to get the ratio right. The proper ratio is supposed to be 4 eggs to 2 cups cream, but I typically use about 3/4 of that (1.5 cups cream) due to my use of additional ingredients. Due to the additional liqui the tomatillos, I cut back the cream a bit. Also, a lot of folks say, "holy moly, whole cream?" Yes, I've done half and half - or used some cream and some lowfat milk. Again, the more liquid you go, the more you need to fill in the gaps with cheese, veggies, or eggs.
Pour the egg/cream mixture into the quiche pan until it's brimming at the top and commence baking. A dust of some of the chili powder on the top gives it a nice look.
Bake uncovered for 15 minutes, then lower the heat to 300. Bake 30 to 40 minutes until you can insert a knife in the middle and it comes out clean.
Quiche Lorraine
This is the original. Use the above ingredients, except substitute swiss cheese for jack/cheddar, drop the tomatillo, chayote, jalapenos, and comino. Use a sprinkle of red pepper flakes instead. Add 8-12 slices of cooked crispy bacon.
Quiche Florentine
Like Lorraine, but drop the bacon and add fresh spinach. I still remember the time I made this when I was a young single guy living in Arkansas. I made a batch of quiche in the little foil pans you get when you buy frozen chicken pot pies, so I could take them to work for lunch. One of my co-workers was asking me what was in there while we were eating in the lunch room, and when I got to the spinach, she said in the best Arkansas accent, "you just ruraned (ruined) it." I don't think I've made it since.
Quiche [insert your idea here]
I think you get the picture - this is a versatile dish - like an omelette - add your favorites, and stick to the cream/egg/cheese ratios, and you'll have yourself a new creation you can call your own.
Monday, April 7, 2008
Poached Salmon Steaks with Lemon Butter and Wine Sauce
In general, I prefer salmon filets to the steaks, as the steaks can get too dry. However, I've found that poaching keeps them good, moist, and flavorful.
This recipe works for three or four steaks and takes about 10 or 15 minutes, so you can prepare all of your side dishes first and do this while they're cooking.
Remove salmon from the refrigerator uncover, and set aside. I like to have it out for up to 30 minutes to get closer to room temperature prior to cooking. This will get your pets stirred up - especially if you have cats.
Sauce Ingredients
As soon as the skillet is hot, sear the steaks for one minute, then flip to the other side. You will likely lose some bits of meat, but that's OK, it will flavor up the sauce nicely. Let the other side sear for just 30 seconds, then pour the warmed sauce into the skillet, lower heat to medium, and cover. Sautee these dudes for about four minutes - up to five if they're particularly thick or still cold.
Remove and serve directly. I recommend pouring the sauce from the skillet into a gravy boat or small pitcher for serving, or just drizzle the salmon directly as you plate it.
To accompany this, any green veggie is good - I like spinach or asparagus with lemon flavors.
This recipe works for three or four steaks and takes about 10 or 15 minutes, so you can prepare all of your side dishes first and do this while they're cooking.
Remove salmon from the refrigerator uncover, and set aside. I like to have it out for up to 30 minutes to get closer to room temperature prior to cooking. This will get your pets stirred up - especially if you have cats.
Sauce Ingredients
- the juice from 1 large lemon
- 1/2 cup dry white wine
- 1/2 stick unsalted butter
As soon as the skillet is hot, sear the steaks for one minute, then flip to the other side. You will likely lose some bits of meat, but that's OK, it will flavor up the sauce nicely. Let the other side sear for just 30 seconds, then pour the warmed sauce into the skillet, lower heat to medium, and cover. Sautee these dudes for about four minutes - up to five if they're particularly thick or still cold.
Remove and serve directly. I recommend pouring the sauce from the skillet into a gravy boat or small pitcher for serving, or just drizzle the salmon directly as you plate it.
To accompany this, any green veggie is good - I like spinach or asparagus with lemon flavors.
Sunday, March 23, 2008
Steamed Pork Dumplings
 Here's my favorite Chinese treat. Maybe when I make it, it's not so Chinese, but I can always try to emulate the best, can't I?
By the way, if you're ever in Houston, the Dumpling King restaurant has the best dumplings in town. I used to like Lai Lai Dumpling House, down in Chinatown, but the dough on those is too chewy.
But I digress...
Start with:
- 1 pound ground pork
- 1 tbsp sesame oil
- 2 tbsp fresh chopped ginger
- 4 cloves fresh chopped garlic
- about 1 cup fresh chopped cabbage (I've used the regular green cabbage, Napa, or bok choi)
- 4-6 big cabbage leaves
- serving stuff (vinegar, soy, pepper sauce)
- won ton wraps (or if you can't find those, egg roll wraps, cut in half, (or if you can't find those, google how to make your own damn wraps! it's just flour and water)) If you have access to a Chinese grocery, you'll be able to find proper circular wraps.
Before you prepare the chopped cabbage, salvage a few big leaves from the outside of the cabbage. You need enough to cover the bottom of your steamer. This recipe will fill up about four bamboo steamers (I usually make about 1/2 pound of meat, and it will fill up my stack of two steamers). If you don't have a steamer, it's OK. Do the pan-fried thing. I've got a posting on pan-fried lamb dumplings from October 2007 in this blog, so after forming your dumplings, move on down to that post.
Start by sauteeing the garlic and ginger in the oil। Once the garlic is translucent, brown the meat in the flavored oil। Drain all the fat you can, once that's done. You then want to have the chopped cabbage tossed with the meat in a bowl. It's best to have the cabbage chopped pretty fine, and toss it with the meat while the meat is still hot, so it will soften. Sharp edges will tear through the tender won ton wraps, and we don't want that, do we?
I'll frequently toss this mixture with an added 1 or 2 teaspoons of flour or cornstarch to help it stick together. Since we're just using ground meat, it's not excited about holding together in a proper dumpling formation. I typically put this mixture in the fridge for half an hour to let it cool a bit. Seeing as I'm about to work with it with my bare hands, I've found that to be a pretty good practice.
To make the dumplings, have a bowl of water and your wraps out. Some folks use egg yolk instead of water - it does have better adhering properties. I like to have a damp towel handy to wipe my hands periodically while I'm doing this (especially if I'm using the egg!).
Moisten the four sides of the wrap. Take a small spoonful of the flavored meat and place it in the middle. I like to take two diagonal corners and press them together (they should stick with the moistening) making a hammock like tube. I then take the other two corners and tuck them under the raised corners. They can't actually tuck under completely - what you want is to get them to paste to the underneath edges of the top corners. You should have an oblong dumpling now. Then seal it shut by taking the thumb and forefinger of both hands next to each other pressing and twisting from one side to the other until you have a classic dumpling shape. It's hard to describe without pictures, but I've found videos on You Tube, so if you can't figure it out, do a little research. After awhile you'll figure out what works for you. Everybody has his/her own style.
To steam, place the dumplings on top of the cabbage leaves in the steamer. If the water is already boiling, it should take 5 to 10 minutes, as the meat is already cooked. You'll know they're done when the wraps look almost translucent. I have one of those two-high bamboo steamers, and I place them in my wok to do this.
Serve with the usual fixin's - I like rice vinegar and pepper sauce, and sometimes soy sauce. The cabbage should be served as an accompanyment.
One note - all of the recipes I've read have you make the dumplings with raw meat and boil them for about six minutes. That will give you a more solid filling than what pre-cooking gives you. I pre-cook for two reasons - one to remove a lot of the fat, two, to make sure the meat is cooked through, and three, to keep the dumplings from falling apart (always a risk). But i've never tried the boiling method - I will do so and write about it one of these days.
Subscribe to:
Posts (Atom)
